HOT SHOT 32- A “DRAWING-LESS” PORTRAIT & A NEW SHORT VIDEO
Today, I’m excited, I have got a new short documentary about “Life Lessons from an Artist” and a step by step demo of a portrait I did without a drawing.
First, it’s all about the film, in 2012- The Life of an Artist was released, today it has has over half a million views, it has inspired many to take up sketching again and for many it has sparked a revival of getting them back to doing what they really love to do. Seven years after, another film is here! This time it focuses in some of the lessons I have learnt over the past seven years and what I have been able to achieve. My message is clear-BELIEVE IN YOURSELF, NEVER GIVE UP and NEVER LET FAILURE drag you down. There are also tips for aspiring plein air painters and lots more, so enjoy this, get a cup of coffee, it is only 10 minutes but it will be worth every minute .
STEP BY STEP DEMO OF “RAPTURED”
A little 6″ x 8″ portrait, oil on board. It is part of my 250 portrait challenge, where I have decided to embark on a journey of improving my portraits by deliberate practice.
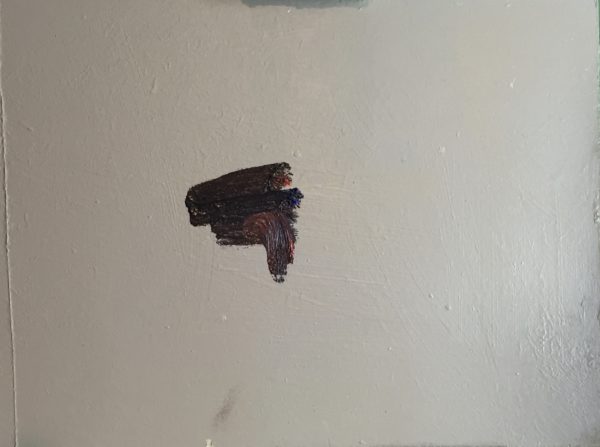
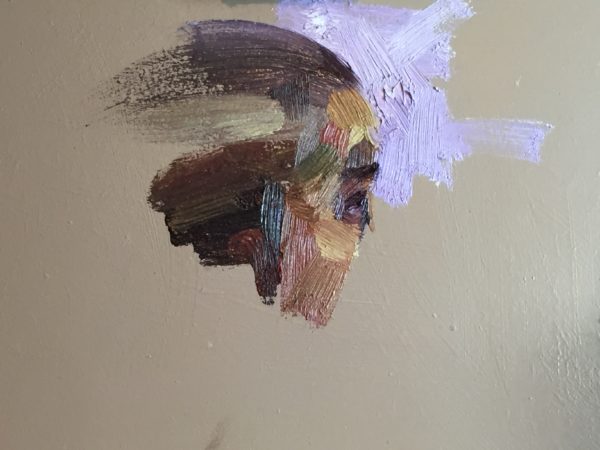
Stage 1– This is the beginning, just about three or four strokes, it is an abstract shape, it could be anything but it is something. I have broken down a feature into small strokes. this is what we do as representational painters, we edit the information we see into simple brushstrokes-that’s where the magic begins! This one starts at his TEMPLE, the side of his head.
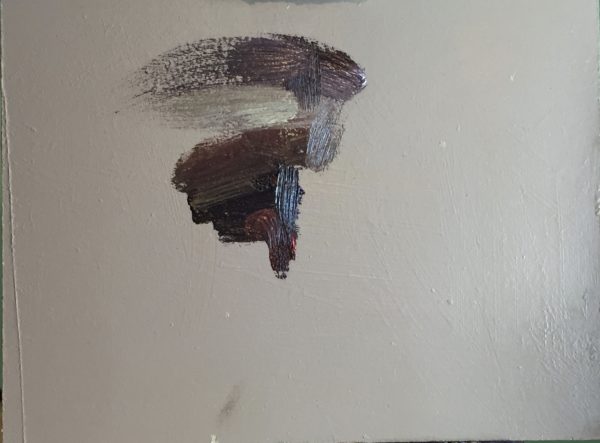
Stage 2– More brushstrokes are added here, I continue, trying my best to plot my way through the structure of his head, this time, the top of his head. The top of the skull is smooth, so I have deliberately swung a curved smooth stroke at the top, it almost looks like a diving fish! This is the beauty of the inside-out technique-it keeps you on your toes, you never know what is coming next!
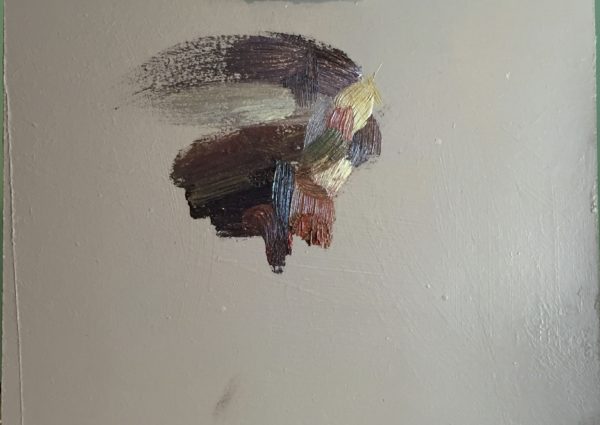
Stage 3– Now I really focus on tiles of colour, just strokes to build up his forehead. I am using a filbert brush and it is held very lightly at the tip in order to get succint and fluid strokes. Can you see the face taking shape? Don’t worry if you can’t, just have faith that it will all come together in the end.
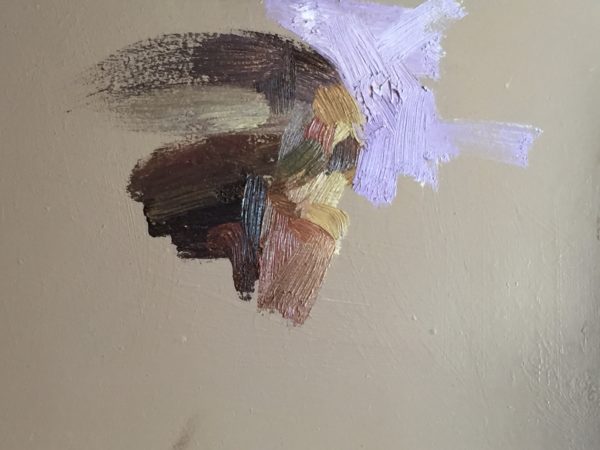
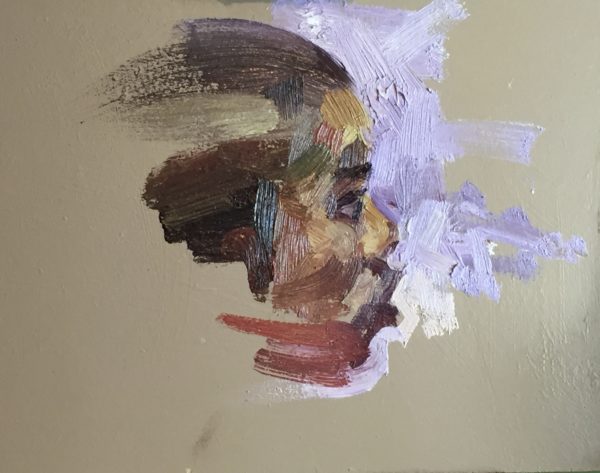
Stage 4- For the first time I add a bit of background with violet and white, this is to help seperate the head from the surface colour. Because the background and his face are warm, it needs a bit of separation for clarity. I have also worked on the cheeks with some warmer tones of burnt sienna and yellow ochre.
Stage 5– Tadaar!!!! The first sight of the world!! He now has eyes! It’s always about the simplicity of breaking things down to basic shapes and having the confidence that it will suffice without anymore tinkering. I’ll also like to mention that painting this way is anything but fast, the strokes might look loose but loose doesn’t always equate to speed.

Stage 6– Now he can not only see but he can smell! The nose has appeared and a bit more background colour to separate the face and draw from outside the face. He is gradually coming alive!
Stage 7– Now he can speak! The strokes are worked in on a shape by shape basis, working on representing the form with the mark a brush makes on the surface. Think about this like sculpting with a brush, the paint being clay. Sometimes you can stroke across and sometimes you can stroke vertically or diagonally across the form but the most important thing is to be able make sure the stroke is your first reaction to what you are seeing, second reactions seldom work. So make sure you look long and hard first of all, observe, analyse and then RESPOND with confidence!
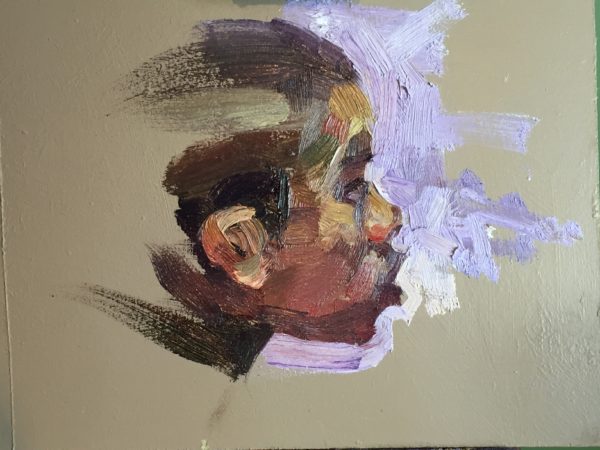
Stage 8– Now he can hear! He also has a neck! This is now becoming fun because each part completed, leads to another part, and as far as I can mix the right colour, in the right tone, with the right temperature, with the right shape and place it in the right place, linking it to an edge that existed before, on the surface, I am sure to get a good representation of what or who I am painting.

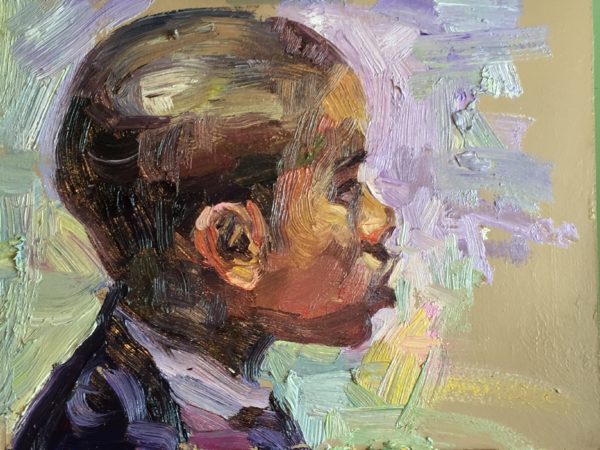
Stage 9– I think I got too excited here and a bit too fast! But I could take a gamble here because I’m approaching the less informative parts of his profile. So I wield my brush a bit too fast and a bit too swift. It is OK as I’m trying to nail the back of his head with a bit of background and body form at the same time, it is not easy but I know I am still in control.
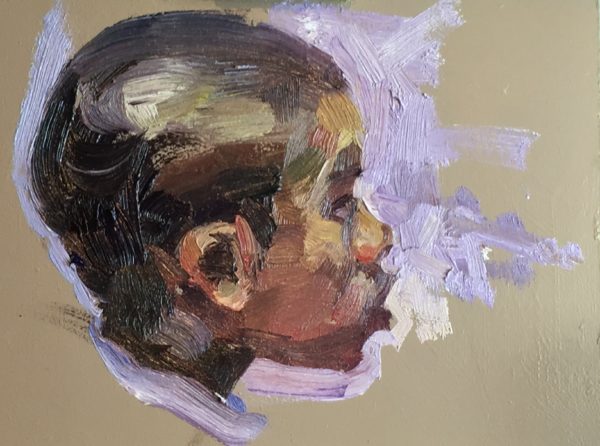
Stage 10– What really supposed to be happening is for each phase to be completed before I move on to the next, but you can tell I am am getting a bit impatient and that’s something you want to avoid. Even with all the rush I seem to have been able to sort out the back of his head! The top of his head is also looking a bit more convincing now!
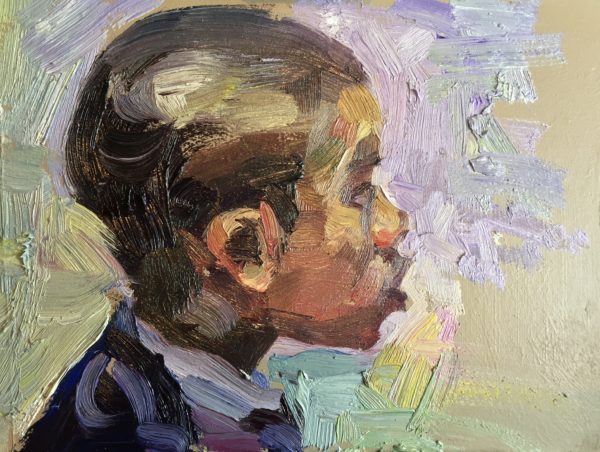
Stage 11- I use this stage to play with the background colours, its really fun, just dabbling into light colour mixtures and playing around with strokes that go in different directions! I also add a bit of his shirt and top. Painting is far more interesting when one is in control. Being in control means you have each stage as accurate as you could ever have made it.
Stage 12 (FINAL)– I dabble back into his ears, adding a bit more detail and I work on the back of his head for a bit more clarity in the tilt of the angle and it being a hard edge. I force myself to stop at this stage because it is really easy to start tinkering, over blending and smoothening out the strokes and that can kill the life of the painting and render it completely dead. So I STOP!!
Hope you enjoyed the video and the step by step demo.
I am planning a live demo where I’ll paint something like this from start to finish, please let me know if you’ll be interested.
Also if you are interested in purchasing this little piece, send me a direct message, it’s £375 unframed.
Keep sketching!
Tagged with: addictive sketcher • Adebanji Alade • alla prima • brushstrokes • demo • inside-out • life lessons of an artist • oil on board • plein air • portrait • portrait deliberate practice series • step by step
Filed under: portraits • Sketching Tips • Uncategorized
Like this post? Subscribe to my RSS feed and get loads more!

Hi Adebanji,
As always great and interesting work, well deserved as I know you work so hard.
A very nice loose portrait too and it is great to see you following in my footsteps of no pre drawing (as with all my work, including watercolour).
I am sure you noticed and felt the wonderful freedom it gives and adds excitement for the artist and the subject, especially in portraiture.
Kindest regards
and continued success
Sincerely,
Daniel McGowan
Thanks Daniel, I am loyal as always!